To help you save time and resources we have written a Step-by-Step guide to help aid and encourage our clients to sign PDF forms electronically. It saves resources by eliminating the need to print so many documents (saving paper and ink) and reduces the amount of waste being produced.
Why not give it a go straight away? Try it on a proposal you already have from us, or get in touch to see how we can help you with SHIFT accreditation, environmental reporting, benchmarking, SECR, zero-carbon road mapping or related consultancy.
Here’s the guide:
1) Open the PDF file in Adobe Acrobat or Reader.
2) Click the (Sign) icon in the toolbar on the top right-hand side of the screen, this icon is circled below in red in the picture below.

-
Alternatively, you can choose Tools > Fill & Sign (circled in orange)
-
Or, choose the Fill & Sign icon (circled in green) from the right-hand side toolbar.
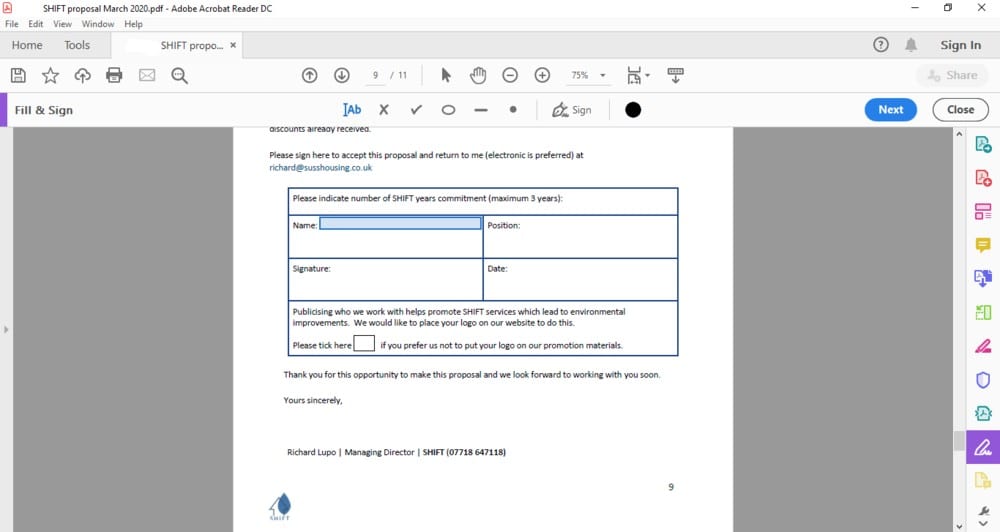
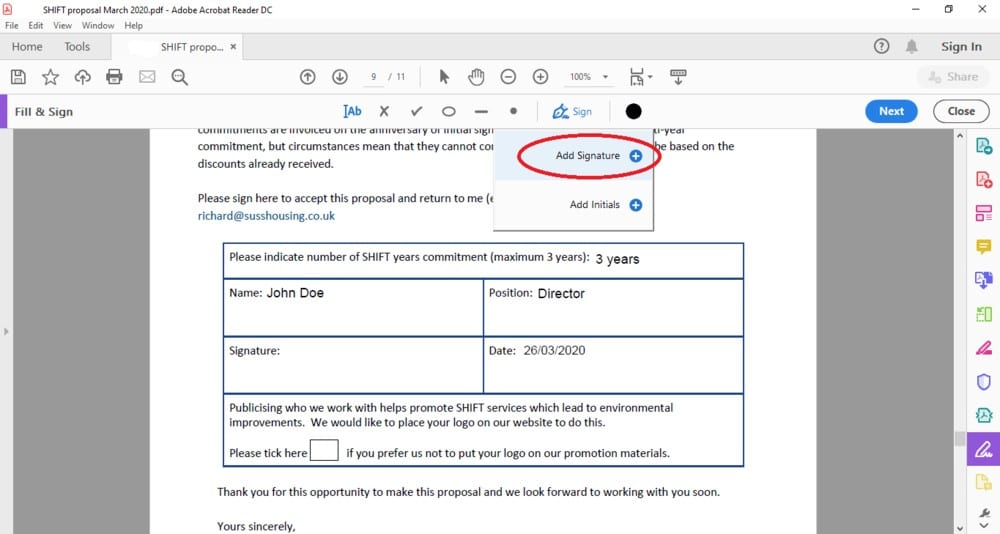
3) Once you have selected the Sign icon, the Fill & Sign toolbar appears across the top of the page, shown in the image below.
To fill out the required fields (e.g. number of SHIFT years commitment, name, position and date), simply hover the mouse over each box, this should then display a blue box (as shown in the ‘Name’ box below). Click anywhere in this box and type the appropriate text in each field.
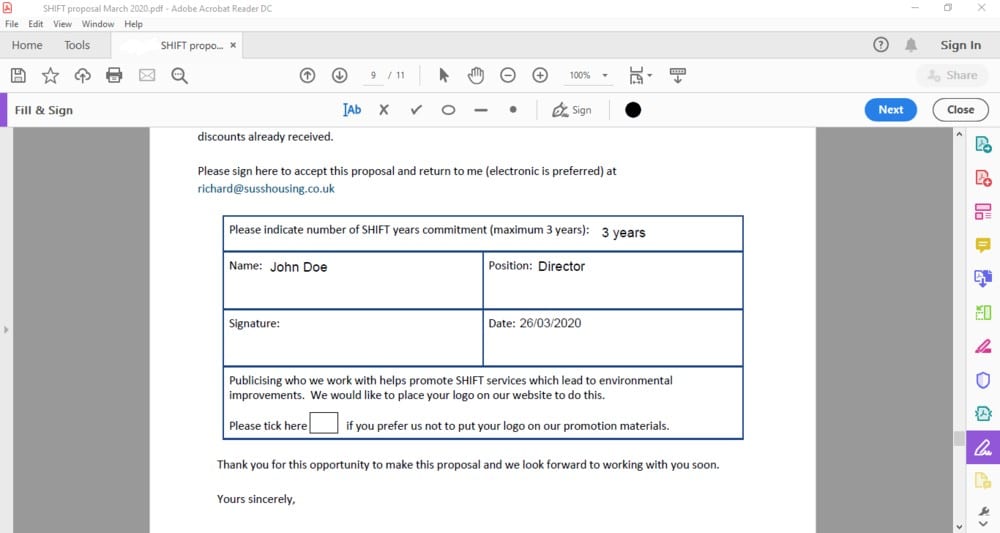
The next image shows what it will look like once all the boxes that can be filled with text are completed:
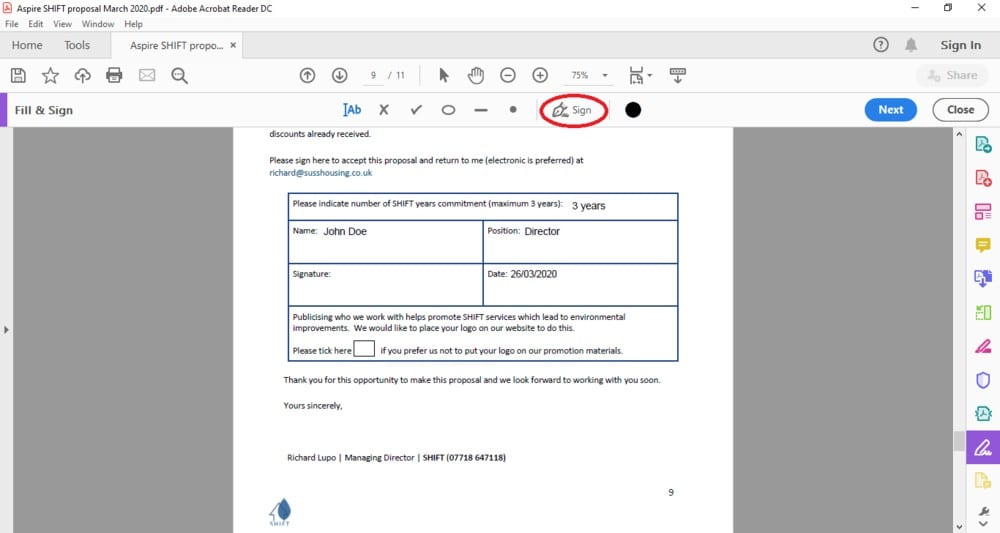
4. To sign the form, click the Sign icon, shown circled in red in the picture below.
5. This gives the drop-down choices below. Here you can choose to enter initials or a signature. To fill in the signature box, click Add Signature (circled in red).
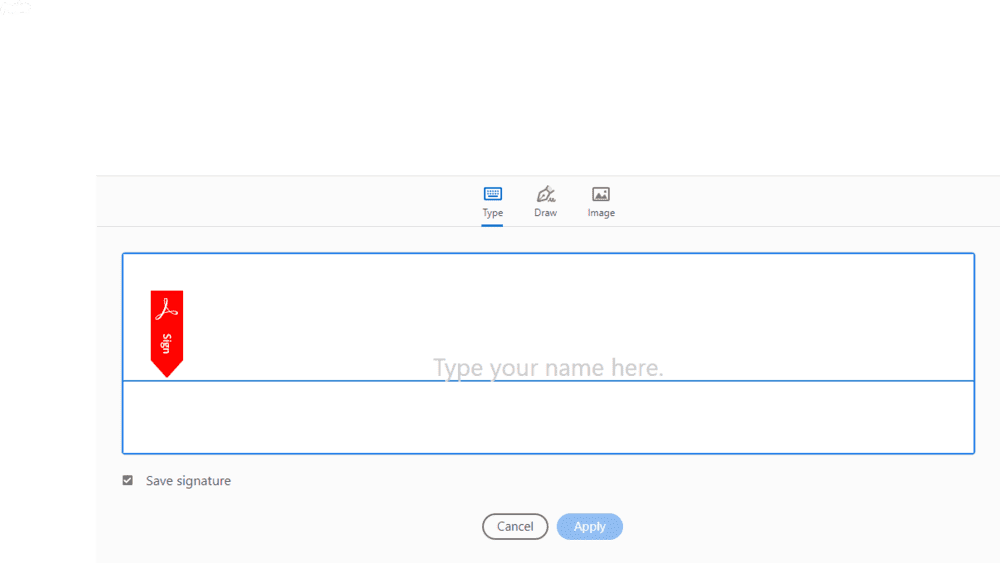
6. After clicking Add Signature, the following box will appear:
Make sure the Save Signature check box at the bottom left of this box above is ticked to make signing PDFs electronically much faster and easier for next time. This will save resources, time and money in the long run from printing, signing and scanning documents!
-
For the “image” option, you can take an image of your signature using a mobile phone/tablet device. Just send the photo onto your laptop via email and save the image, then follow these steps:
a) Click Image (circled in red)
b) Then click Select Image (circled in green)
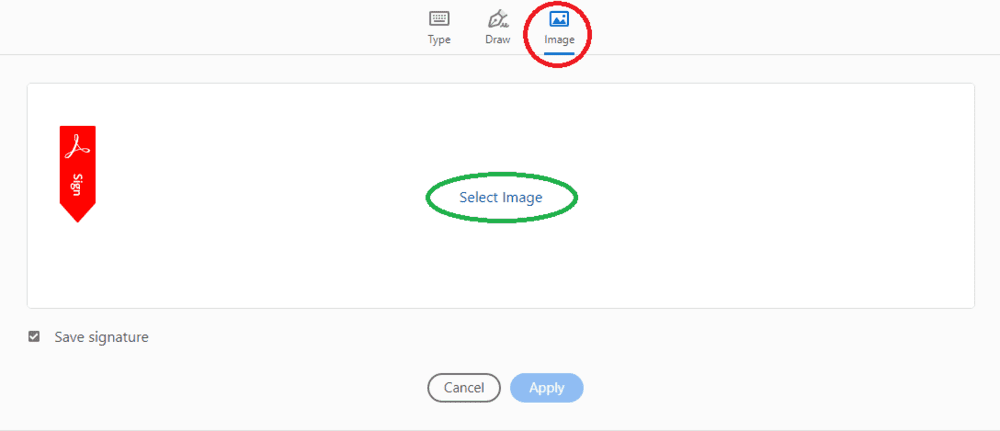
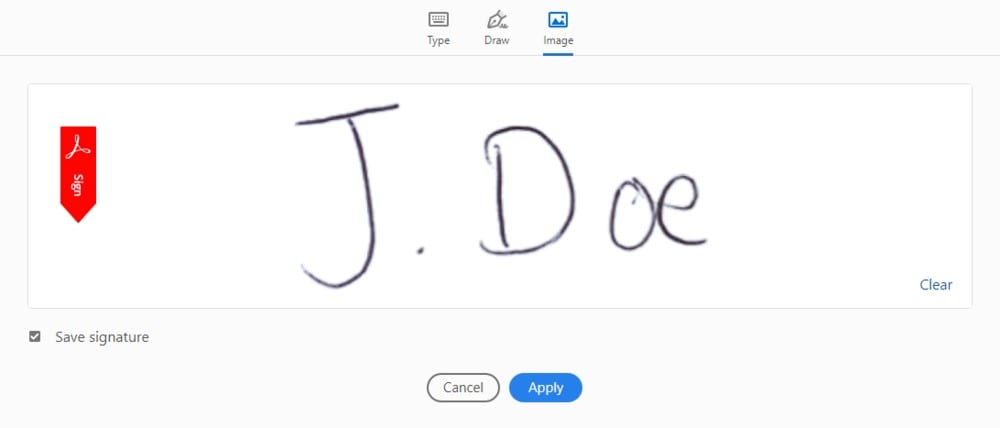
c) Browse and select the image of your signature. This will then be transformed into an electronic signature as shown in the image below. Click Apply and then click in the signature box to place the signature there.
-
Another option is to “Type”. This gives you the option to type your name as a signature. Simply click in the box and type your name. You can then change the font using the Change style button that appears at the bottom right-hand side. Then click Apply, position the signature in the box and click the mouse to place the signature.
-
Alternatively, you can use your mouse to draw your signature. To do this, select the Draw icon (circled in red below) and draw your signature with the mouse.
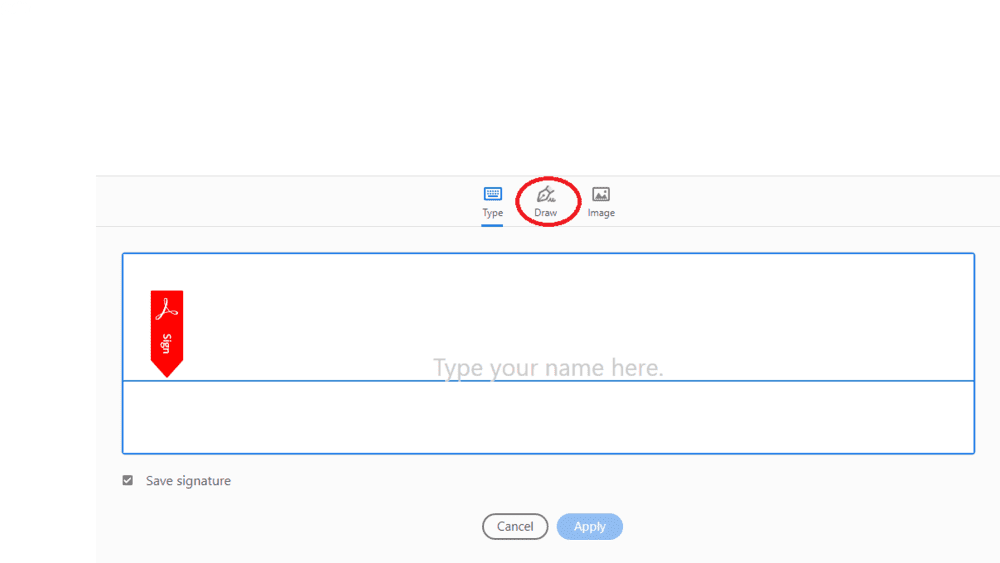
Then, click Apply – this will give you your drawn signature. To put the drawn signature in the box, move the mouse over the ‘Signature’ box and click where you would like to insert the signature.
After this, you will have completed signing the PDF electronically, and the completed PDF will look similar to the example below.
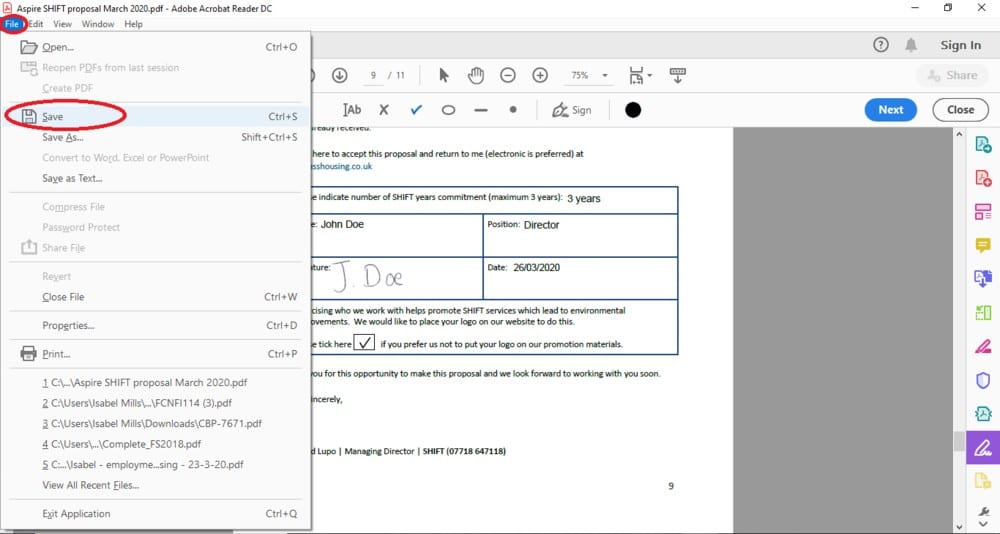
7. Finally, save the signed copy of the form and email it back to us. To save the form, select File > Save.